Tips and Tricks for Photographing Volleyball
So you have a family member or friend who plays volleyball and you have decided to photograph some of the action. Good for you! On the surface, this sport seems to be fairly easy to photograph. All the players face the same direction. They don't move very far. The playing area is small in comparison to other sports. Easy! Oh no, not so fast. You are not getting off that easily.
While this sport does have certain advantages for the sports photographer, you will face some formidable obstacles such as photographing indoors (think, low light), angle problems, a large net in the middle of the court that throws off your focus and lightning-fast ball speeds. Have I scared you off yet? No fears. I am going to walk you through some of those problem areas and set you up for success.
Today we are going to discuss the art of photographing indoor volleyball. Beach volleyball has its own nuances and I will revisit that at another time. Before you even get started you will need to deal with the lack of light in the gym where the game is being played. While our eyes see it just fine, you will find that your camera will start screaming at you that there is not enough light so that it can keep your shutter speed high to avoid blur. At this point, I am going to direct you to an earlier article I wrote on Photographing Indoor Sports. That piece will help you set your camera so that you can capture all the action without getting dark blurry images.
Now let’s talk about actually photographing the sport. In general, each side is going to touch the ball three times before it is slammed back to the other side. One team serves and the receiving team will use the first two touches to set the ball up to the player spiking it across to the other side. The players in the back rows spend a lot of time diving and sliding while the front row is jumping high to either set or spike. Your positioning will determine which row you are capturing.
Let’s talk about catching those diving back row players. First tip…be patient with yourself. Capturing a diving player is a low percentage shot. You have to be ready to shoot with a hair trigger finger and get lucky that they are facing you when they dive, and there aren’t three sets of legs in front of your shot. It does happen, but it takes some time. The best angle for these shots is down low and level with the front row and near the net. That way you are shooting back towards the players diving forward. You need to follow the players in the camera and not try to follow the ball. You are shooting when you see a player lunge towards the ball. Don’t hesitate. Shoot. Read my article on Shooting on Instinct to get better at this.
Once that first player makes contact the ball is going to be launched towards a setter. The setter is in the front row most times and is the one trying to control the ball and ease it towards the player who will spike it back over the net. The setter is the easier of the positions to capture as that is a bit slower and more methodical.

Finally, the last player is going to place or spike the ball over. This is a tough shot from the side. It can be done, but the timing is precise as to not have the spiker’s arm cover his or her face. You ideally want the hitter to be using the arm furthest from you. Another option is to stay low and move towards the opponents’ side and shoot back towards the net. You can shoot wide and get the interaction with the offense and defense.
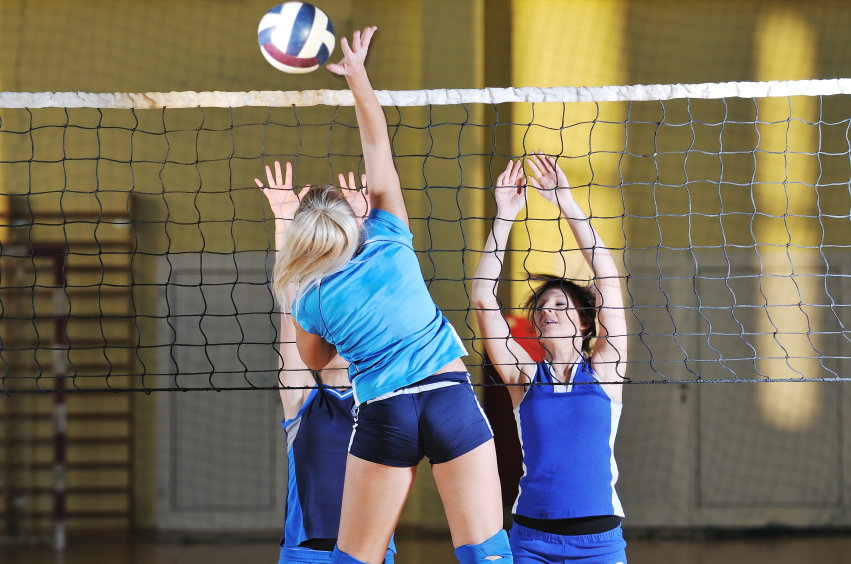
After you take some time to capture the action from this low angle, you will want to move positions and try to capture some photos from straight on. This is an angle directly behind the opposing team. From this angle you can capture the spiker slamming the ball towards the opponent and also going up to block the ball on defense. There are pros and cons from this angle. On the positive side, your focusing is much easier because you are basically focusing on one plane, right? Right to left, all at the same distance from your camera. When they are blocking, they are right up against the net. When they are spiking, they are right up against the net. The challenge is getting up high enough so that you see their faces over the net. For the young players, that may never happen and you will have to live with seeing them through the net. For high school and college players, you stand a pretty good chance. In a perfect world, you would grab one of those super long lenses, climb to the top of the bleachers behind the opponents and pick them off as they soar over the top of the net. Like shooting fish in a bucket right? The reality is that you probably don’t own that super long lens and will need to make due with standing on the court or perhaps a few rows up and wait for openings when they go up for the ball and the opponents are not blocking your shot. It can be done. Again. Have patience with yourself and keep shooting quickly.
I told you it wasn’t as easy as it sounded. Haha…Get in there, learn how to work with low light, explore different angles and shoot quickly. You will be surprised at how many great shots you will capture.
Have a blast!
NEW! Free Sports Organization Resources
All of TeamSnap's ebooks, articles, and stories in one place. Access Now

